Invicta Flies - Ruff Drummer, page 2
Step Four- thorax
 |
Clip a full, long herl from both a brown and a white ostrich plume. Place these together, align the tips, and stroke the herl backwards toward the butt ends to get the individual fibers to stand straight out from the stems. Tie the two herls together on top of the hook right at the front edge of the dubbed abdomen with three close thread wraps. Clip the excess tips.
|
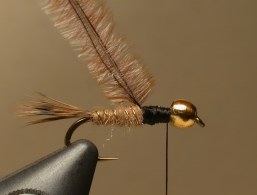 |
Form a dubbing loop with the thread and anchor it directly on top of the tie-in point for the ostrich herl. (Click here to view a diagram of how to form the dubbing loop.) Wind the thread forward to the brass bead. Place the two herls within the dubbing loop. Stroke the herls and the loop together, making sure all are taught, and clip the end of the loop in a hackle pliers. Make sure both herls and both sides of the loop are secured in the pliers, and that all materials are equally tight.
|
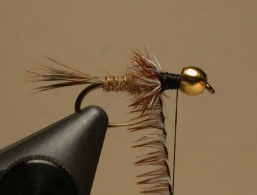 |
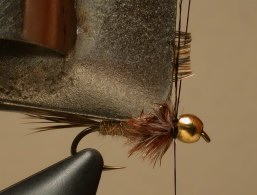
Twist/spin the dubbing loop to form a rope of the ostrich herl. Keep spinning until an even, tight rope is formed. If some of the fibers tend to stick together instead of spinning around the rope, gently wiggle them with your fingertip. Once the rope is formed, wet your fingertips and stroke all the fibers to the rear. Wind the folded rope forward, every turn or so stroking the ostrich herl fibers back out of the way. Wrap the thorax all the way up to the brass bead, tie off on top of the shank with three turns of thread (each on top of the previous turn), and clip the excess.
|
Step Five- hackle
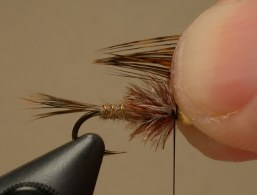
Select a well-marked body feather from the grouse skin. You can use the same feather as the tail, or choose another with different markings. Separate a segment as wide as the hook shank length and align the tips. Grasp the tips in your left hand and clip the segment from the feather. Carefully, so you don't misalign the tips, switch the bundle back to your right hand and hold against the hook to measure for length. They should be as long as the shank, minus the area occupied by the brass bead (slightly longer than the tail).
|
 |
Keeping the section of fibers flat, insert them into a clip, the edge of which marking the length. Trim the butt ends so they protrude about one and a half hook eye widths from the clip's edge. Form a dubbing loop immediately behind the bead and insert the edge of the clip. Pull the loop taught and slide it off the edge of the clip to trap the feather fibers. CAREFULLY remove the clip. If any fibers get too far out of line, VERY gently tap them back into place.
|
 |
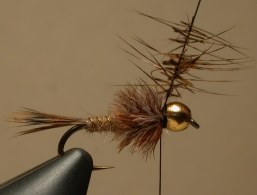 |
Twist the loop a couple times to tighten it, then note the length that the material occupies in the loop. The "rope" of hackle we are forming needs to be just long enough to make one complete turn. If it's too short, VERY CAREFULLY pinch a few fibers and move them along the loop. When the length is right, spin the loop. As with the ostrich herl, if any fibers stick together, nudge them along with a gentle push.
|
 |
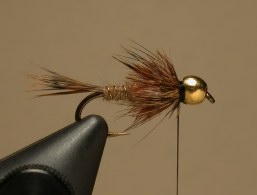 |
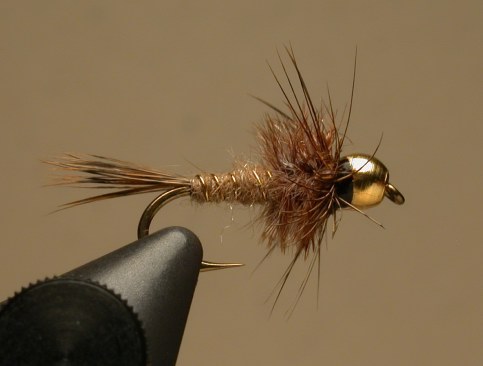
Once you've spun a tight, even "rope," wet your fingertips and stroke all the fibers rearward. Take a full turn with the loop to wrap the hackle, then tie it off on top. Clip the excess loop, which should just be the extra thread. Whip-finish the tying thread and clip. Run a bead of head cement all the way around the thread just behind the bead while the hackle fibers are all still leaning to the rear. Sneak in with your dubbing needle and stroke just the ostrich herl thorax so the fibers stick straight out from the fly. This will force some of the hackle fibers forward, which will stick to the head cement and end up forming a nice, splayed collar.